
Hello and happy monday.
Today we will make some Christmas wrapping paper
and we use lettering as a part of the decoration.
This is a very easy and
relaxing way to make unique and noticeable wrapping paper to you Christmas
gifts.
Take your kids and family
with you on this project, this is so easy and fun!
One thing I love to make my
own papers every year is the thing that I get to practise my big writing,
big
lettering. It is very good practice, big writing gives you more feeling of
the rhythm and freedom of writing. That is something that I can´t feel when
doing small writing.
This project was one year published also, at Somerset Studio Magazine.

Tools and materials:
-Big empty table ( you can
cover it with plastic )
-Wraping paper without any
pictures. Try to find very plain and if you don´t,
use the empty backside of the
paper to make these marks
-Pens, markers, drawing iks,
calligraphy pens, pencils, neopiko markers, brushes.
Almost anything is good
for this project.
-colors- you can use what
ever you find from home- acrylics, waterbased etc.
If you work with kids use
colors which are suitable for kids.
-white fluid color like
acrylic etc.
-Text, I did use common
Holiday phrases but everything christmas
or holiday expressions are good for
this.
-stamps (optional)

Technique:
Cut your wrapping paper to large pieces. Use your table as a measurement because you really want to
do as big
sheet as you can at once. If you like, you can rule
some slope lines on the paper if that makes your writing and thinking easier.
Start to write, I usually
start with my biggest tool, since there is a lot´s of paper to write.
Let it dry well if you use brush and watery
inks.
Take smaller tool and
different color and continue writing.
Dont´worry if there is gaps or mistakes.
You can always take smaller
tool and fill those gaps with small writing.
There is no right or wrong way on
this one. That makes it so relaxing.
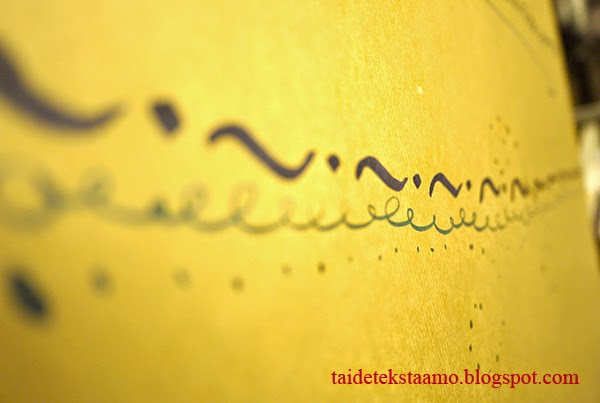
Write one line on top of the
other line, with different color and tool. That gives amazing shadow effect to
paper.
Try also write every
other line with different tool. It gives a lot´s of texture. Don´t worry if you
make a mistake, really, it does not matter. You are going to cut this paper and
wrap a gift in it so all mistakes
just disappear when you use this paper.
Now you have a chance to try
your stamps, too, if you like. Go with the flow.
At the end when all is dry,
add water to your white color and fill your brush and
shake it on the top of your writing. It is amazing how much this small thing change the paper.
It makes it alive, gives dimension, feels like it is snowing.
Tip:
cut some paper which you
just made as a rectangle shape and use it as a ribbon with
your wrapping paper.
Awesome.
Have a great week!
from happy calligrapher Marika K-K

Heipä hei ja hyvää maanantaita!
Tänään tuunataan lahjapapereita kirjaimin. Nämä lahjapaketit huomataan varmasti :)
Tänään tuunataan lahjapapereita kirjaimin. Nämä lahjapaketit huomataan varmasti :)
Ota
isommat lapset mukaan tekemään omat joulupaperit.
Projekti on julkaistu Ihana-lehdessä viime vuonna!
Tarvikkeet:
-Teksti jota haluat kirjoittaa paperiisi
-tyhjää lahjapaperia (ei kuvioita) tai käännä kuviollinen
lahjapaperi
toisinpäin ja kirjoita nurjalle puolelle tekstiä
-tusseja, lyijykyniä, kuulakärkikyniä, neopiko sivellinkyniä
ja
mitä vain kyniä ja kirjoitusvälineitä kotoa löytyy
-vesivärejä ja pensseleitä
-valkoista juoksevaa väriä (akryyliväri /vesiväri
laimennettuna vedellä)
-viivoitin

Levitä paperia noin kahden metrin pala pöydälle. Tee
muutamia vinoviivoja paperille.
Nämä ovat enemmänkin ohjenuorana sinulle kuin
tarkasti noudatettavia linjoja.
Voit vetää viiivoja hieman sekaisinkin ja
päällekkäin.

Aloita isoimmalla tekstillä ja isoimmalla tussilla /
pensselillä kirjoitus. Jätä rivien väliin tilaa reilusti.
Vaihda sitten väriä ja kirjoita seuraava teksti ensin
kirjoittaman tekstisi rivien väliin. Jos vielä jää tilaa, ota kuulakärkikynä
tai ihan ohut tussi ja kirjoita muutama lause aukkopaikkoihin.
Kun paperi
leikataan ja kääräistään lahjan ympärille, mahdolliset virheet kätkeytyvät pois
näkyvistä.
Ei siis hätää vaikka jokin kirjoitusvirhe paperille syntyisikin.

Täytä koko paperi näin ja vaihda kynää ja väriä välillä.
Kokeile rohkeasti isoja kirjaimia ja rentoja viivoja.
Halutessasi voit käyttää
lisänä myös leimasimia koristelussa
tai piirrä pieniä koristeita sinne tänne.


Anna kuivua.
Lopuksi roiski siveltimellä valkoista väriä pisaroina koko
paperille. Tämä tekee ihanan lumimaisen vaikutelman paperiin ja saa kirjaimet
näyttämään kolmiulotteisilta.


Anna kuivua hyvin ja paketoi lahjat itse koristelemaasi joulupaperiin.

Oikein mukavaa joulun odotusta täältä
taidetekstaamolta :) toivottaa
iloinen kalligrafi Marika K-K
No comments:
Post a Comment